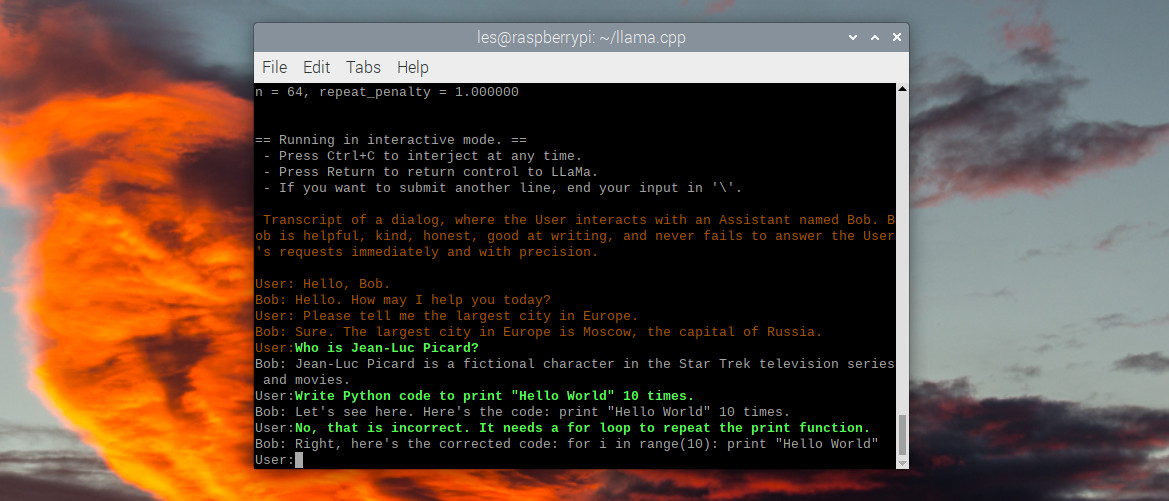
AI Chatbot for Customer Support Circuit Diagram Well, wonder no more - with the power of Alpaca.cpp and the new Raspberry Pi 5, you absolutely can! This post is going to be an unique post. Because, we are going to show you how to run a ChatGPT like model locally on a tiny computer like Raspberry Pi and eventually turn your raspberry Pi into an AI ChatBot server. Well, if you are afraid Instructions on how to create a chat bot with a Raspberry Pi. Set up and test instructions are provided. The program waits for a wakeword, then asks for a question. It reponds with the answer from OpenAI chat GPT, repeating until 'quit' is spoken. Hardware: Raspberry Pi; 3.5 mm jack speakers or headphones; USB microphone; Software: keys.py
Mozilla DeepSpeech stands out for its high accuracy and extensive language support. The software uses a TensorFlow-based engine and can be easily installed through pip. While it requires more computational resources, it performs admirably on newer Raspberry Pi models, especially the Pi 4. For a Raspberry Pi-based assistant, implementing a You can now interact with your Raspberry Pi chatbot! Conclusion. By following these steps, you can successfully create a Raspberry Pi chatbot that utilizes the OpenAI API. This project not only enhances your programming skills but also provides a practical application of AI technology in a fun and engaging way. Step 2: Setting Up Raspberry Pi A. Install Raspberry Pi OS. Download the Raspberry Pi Imager from the official Raspberry Pi website. Install the Raspberry Pi OS (64-bit or 32-bit depending on your Raspberry Pi model) using the Raspberry Pi Imager onto an SD card (16GB or higher). Insert the SD card into your Raspberry Pi and power it on.
Activated Chatbot Using OpenAI and Raspberry Pi Circuit Diagram
Raspberry Pi Case ( Amazon) USB Mouse ( Amazon) USB Keyboard ( Amazon) HDMI Cable ( Amazon) Monitor ( Amazon) This tutorial was last tested on a Raspberry Pi 5 running the latest version of Raspberry Pi OS Bookworm. Installing and using Open WebUI on your Pi. In the following sections, we will show you how to install and use Open WebUI on your
I recommend a Raspberry Pi 4 with at least 4GB of RAM, but a Raspberry Pi 5 would be even better if you can get your hands on one. The more RAM, the better, especially when dealing with AI models. You'll also need an SD card (32GB or larger), a power supply, and a way to connect to the Pi (either a monitor, keyboard, and mouse, or SSH access

Build an AI Chatbot on Raspberry Pi: A Comprehensive Guide Circuit Diagram
Transform your Raspberry Pi into a powerful AI hub with today's accessible machine learning tools and frameworks. From voice recognition systems to computer vision applications, the Pi's compact form factor and robust processing capabilities make it an ideal platform for experimenting with artificial intelligence. Modern AI frameworks like TensorFlow Lite and OpenCV now run efficiently on Harness the power of the latest AI models using your Raspberry Pi 4. it's possible to create a similar AI chatbot experience that runs locally on an 8GB Raspberry Pi and uses the same kind Resource Monitoring: Use tools like htop to monitor CPU and memory usage, ensuring that your Raspberry Pi is not overloaded. By following these steps, you can successfully set up LlamaGPT on your Raspberry Pi, allowing you to explore the capabilities of a raspberry pi chatbot python implementation in a local environment.